Before you start
You need three things:
- An Odoo database with the ZPL Label Designer PRO module installed. Odoo prints the labels; this designer is where you draw them.
- A free account here. Register
- A connection to your Odoo: its address, the database and an API key, under Odoo Connections. The connection video shows it step by step.
The designer reads model and field names from Odoo, to offer them in the editor. It stores your label layouts and the API key, not your Odoo data.
Create a label
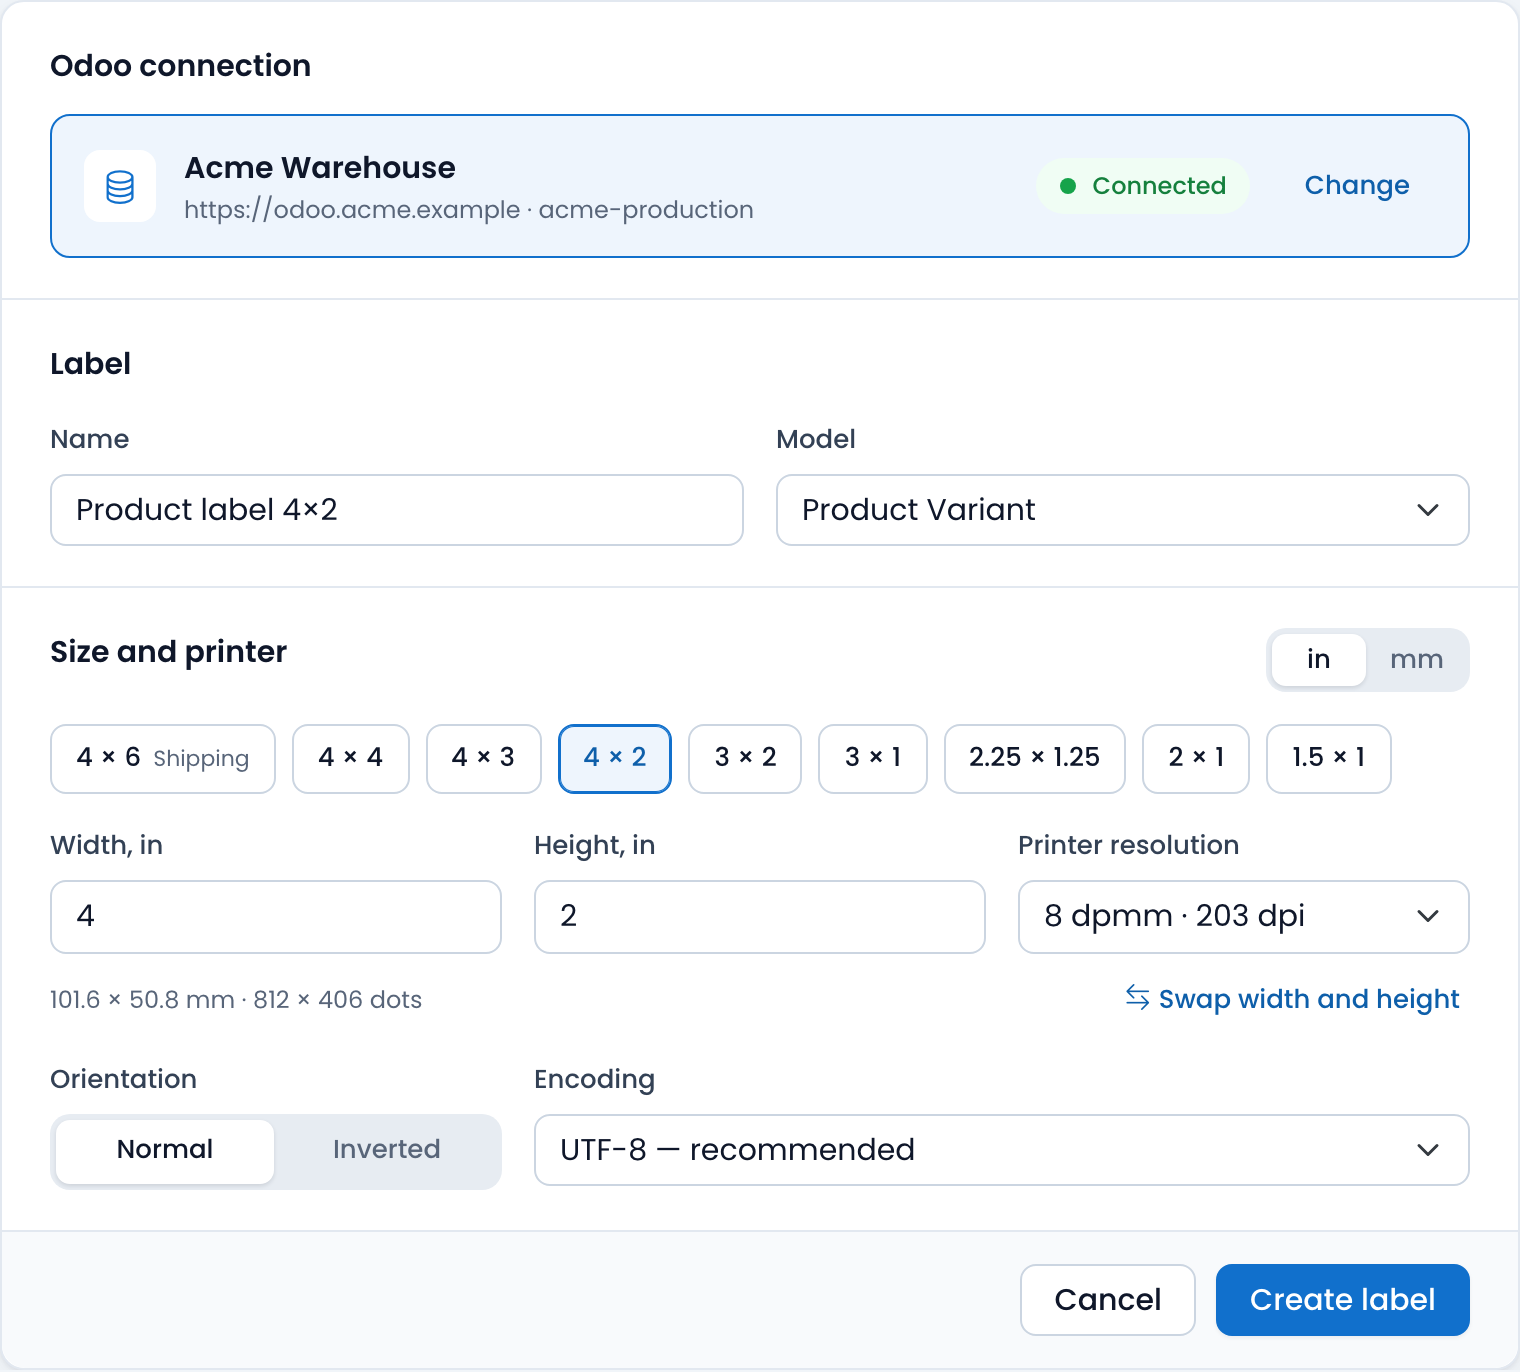
- Open Labels and choose New label.
- Choose the Odoo connection, give the label a name and pick the model it prints for: Product, Lot/Serial, Package or any other model. The connection and the model cannot be changed later.
- Pick a size from the presets for common thermal label stock, or type the width and height. Switch between inches and millimetres with in / mm: the choice is remembered. Under the fields you see the size in the other unit and in printer dots.
- Set the printer resolution to your printer's: 152, 203, 300 or 600 dpi. It is printed on the printer or in its manual (8 dpmm is 203 dpi).
- Leave Orientation at Normal unless the printer feeds labels upside down, and Encoding at UTF-8 unless the printer needs another character set.
The size, resolution, orientation and encoding can all be changed later, in the editor.
The editor at a glance
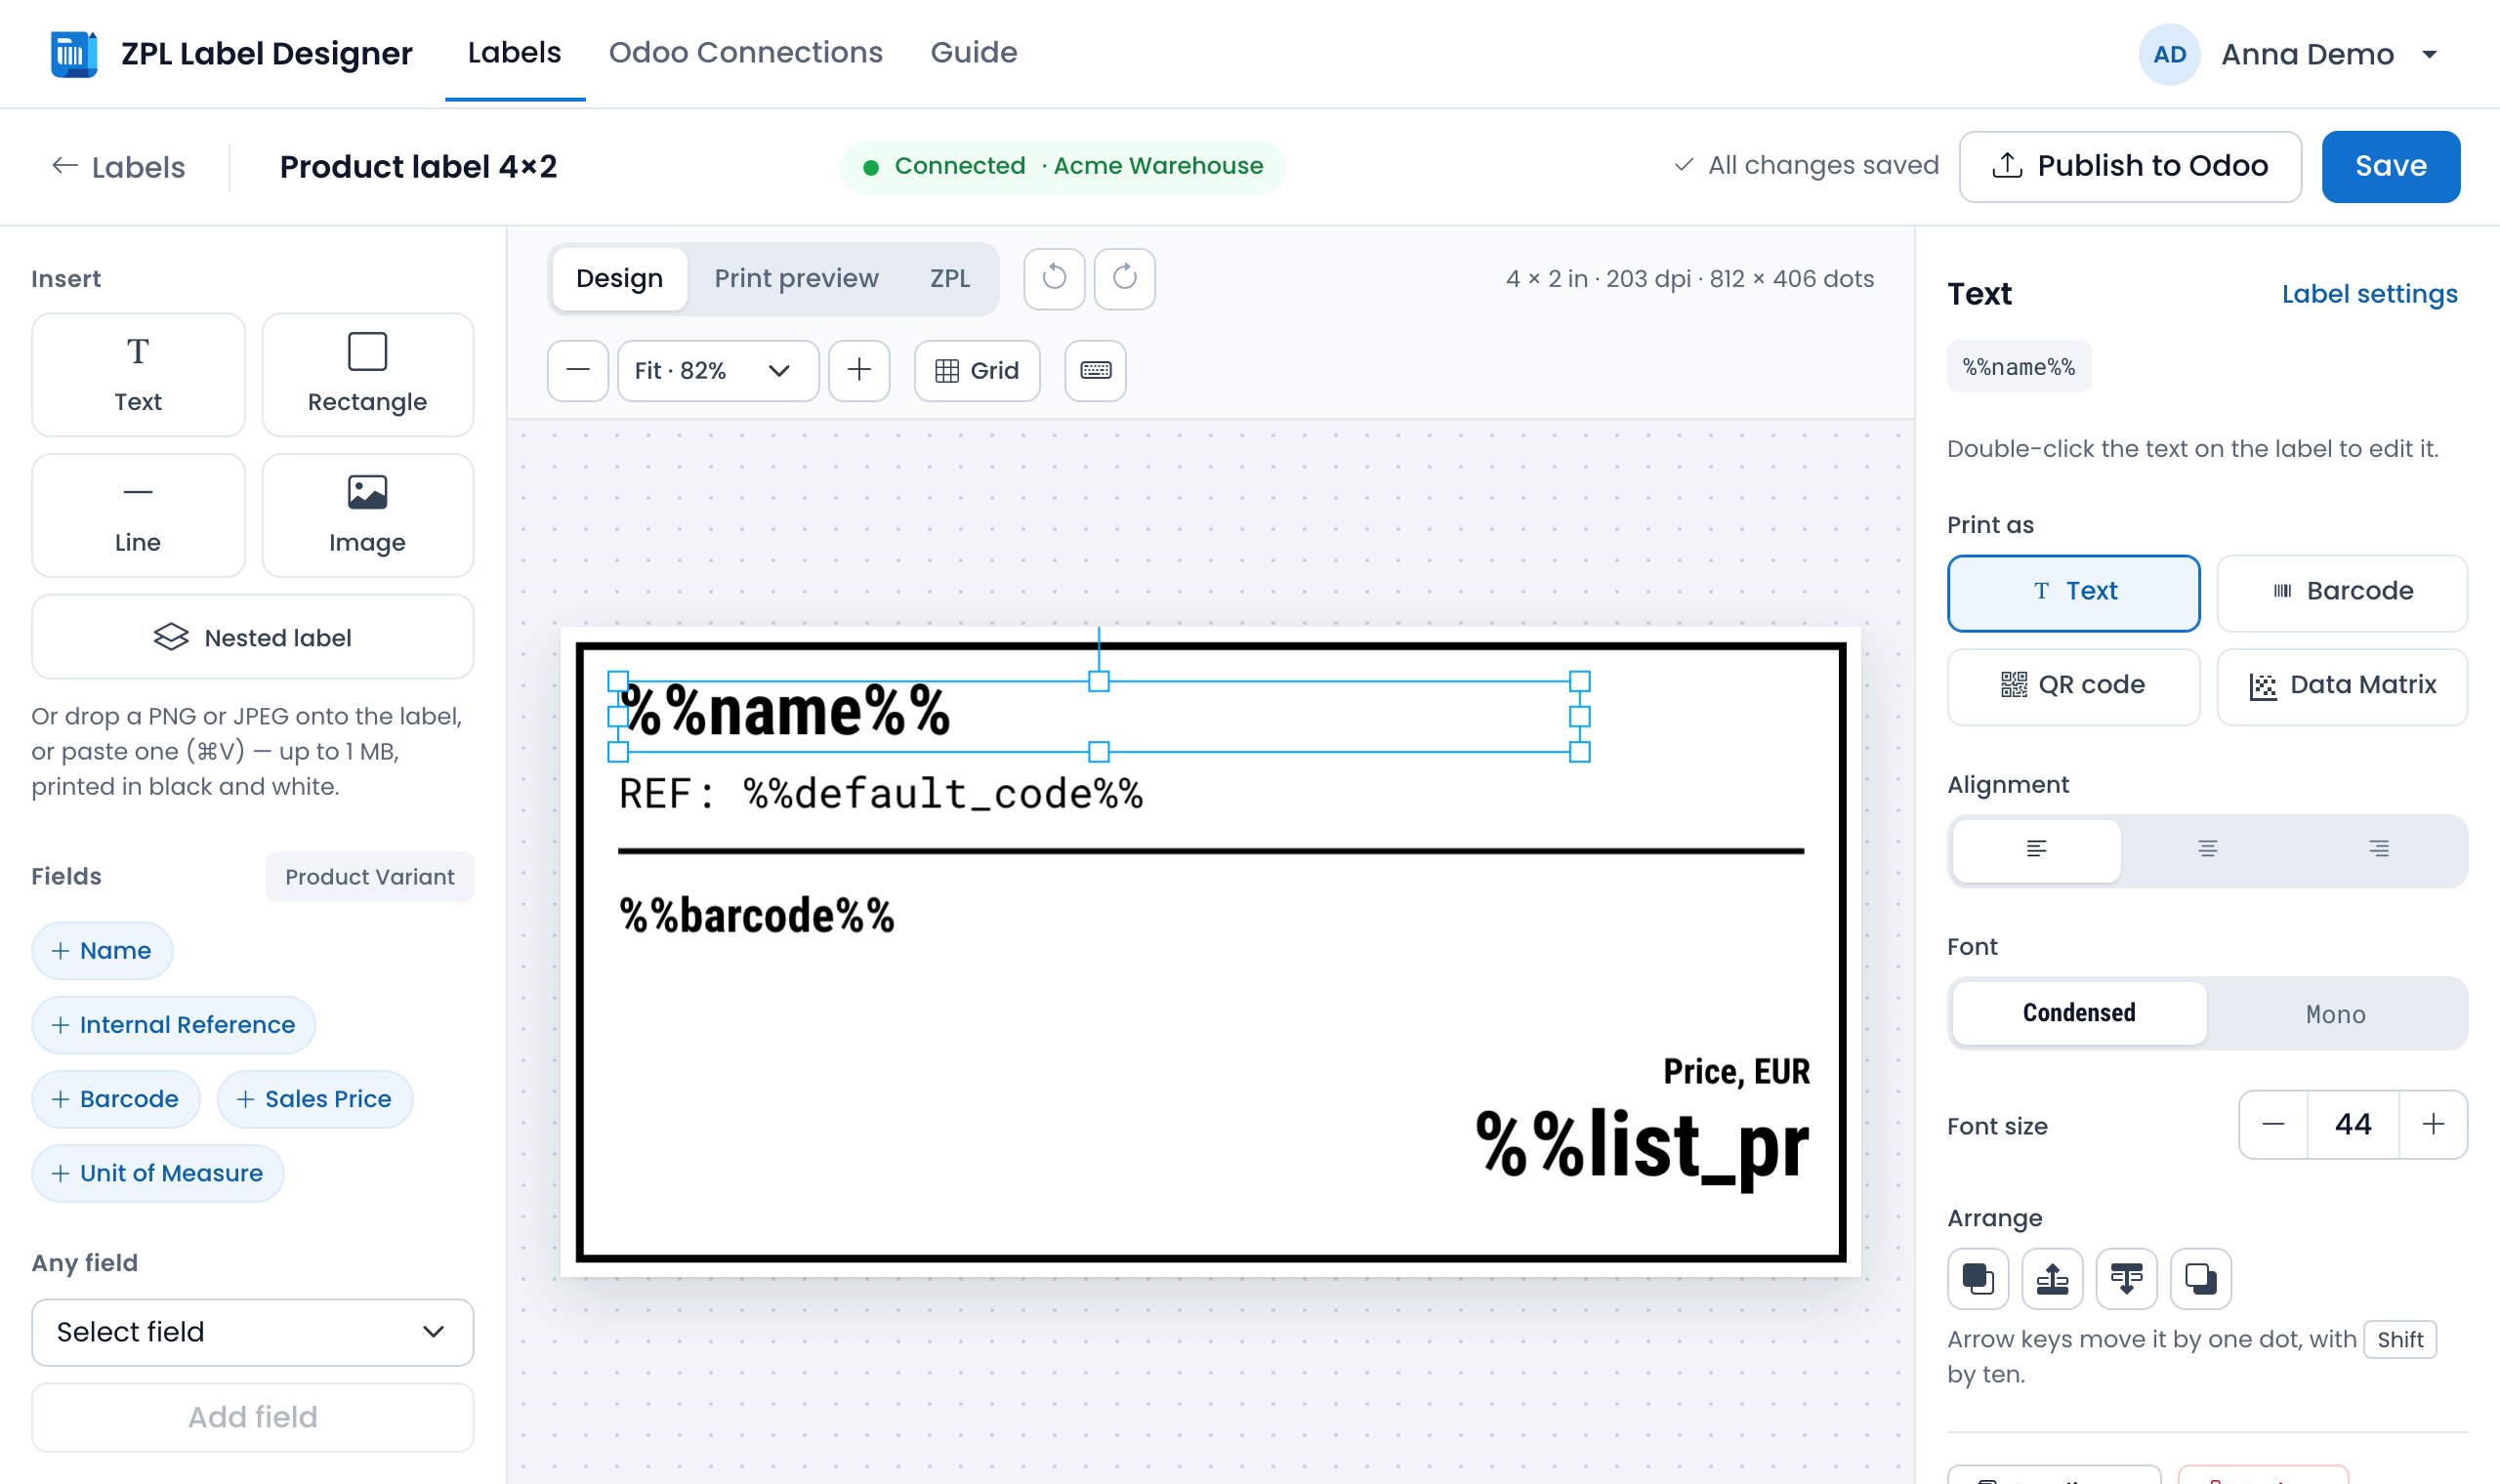
- Insert, on the left: the elements you can put on the label, and the fields of the label's Odoo model.
- The label, in the middle, on a dotted ground. Above it are the Design, Print preview and ZPL tabs, undo and redo, the size, the zoom, the 1 mm grid and the keyboard shortcuts.
- Properties, on the right: the settings of the selected element. With nothing selected, the label's own settings: size, resolution, orientation and encoding.
On a phone or a narrow window the label comes first, with Insert and Properties under it behind a switch.
Add text, shapes and images
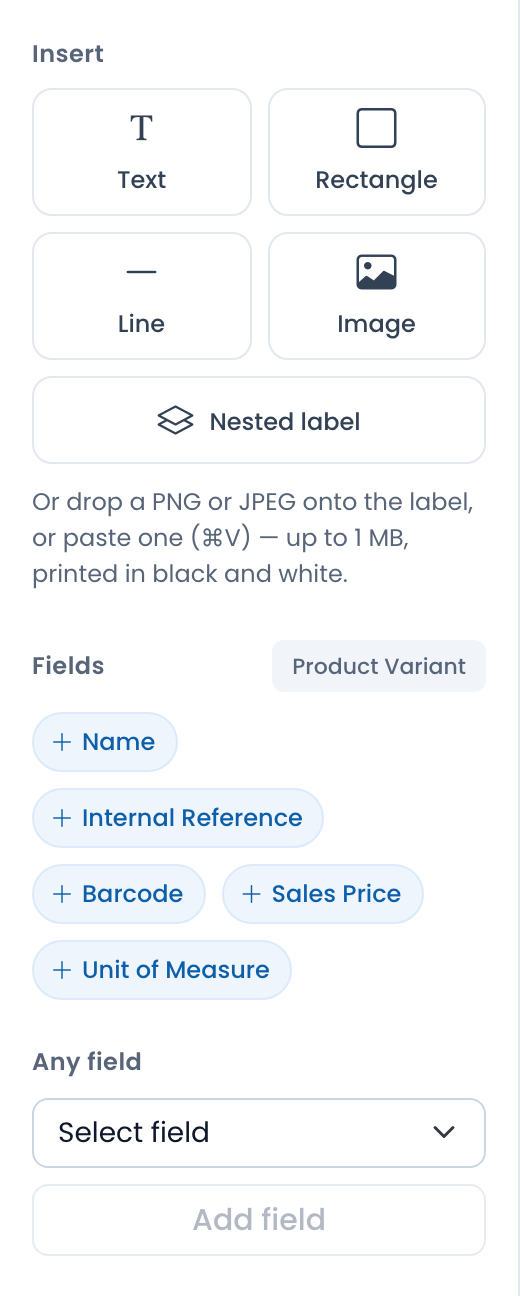
- Text, Rectangle and Line: click the tile and the element appears on the label, ready to move.
- Image: click it to choose a PNG or JPEG, drop the file onto the label, or copy an image and paste it with ⌘V (Ctrl+V on Windows). Up to 1 MB. Thermal printers print one colour, so images print in black and white.
- Nested label: another label printed inside this one, once for each line of a one2many or many2many field, side by side or stacked. For example, the components of a product, each with its own small label. Read more in the nested labels article.
Use data from Odoo
A field is a placeholder in a text element, such as %%name%%. When Odoo prints the label, it puts in the value from the record being printed: the product's name, the lot number, the package reference.
- Quick fields: the most used fields of the model, as buttons. For products, for example, Name, Internal Reference, Barcode and Sales Price.
- Any field: choose a field from the list. A field marked → points to another record; choose it, then one of that record's fields, for example the product's Unit of Measure, then its Name. Then Add field.
- Barcodes and QR codes: add the field, select it and set Print as to Barcode, QR code or Data Matrix. See which barcode types are supported.
- Formulas: to format a date, join two fields or calculate a value, use a Python formula. See how to use formula fields.
Edit an element
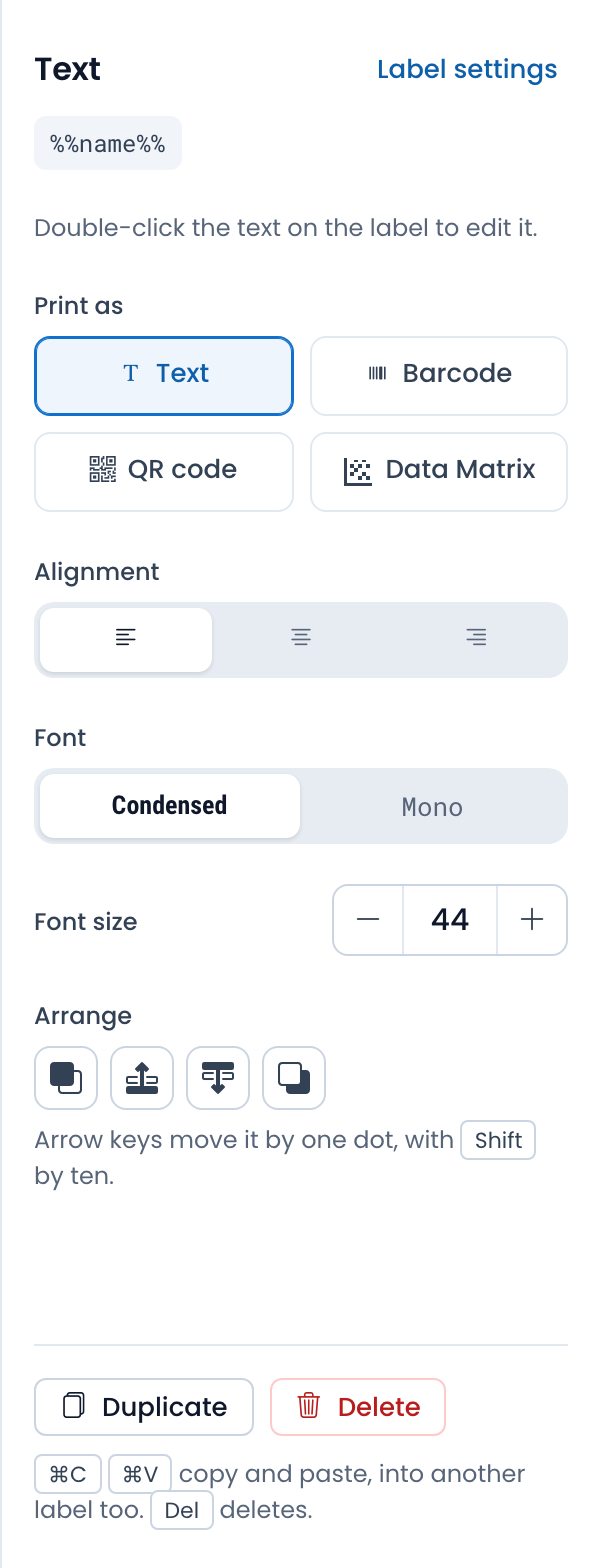
Click an element to select it. Its properties appear on the right; drag the element to move it and its corners to resize it.
- Text: print it as text, a barcode, a QR code or a Data Matrix code; the alignment; the font, Condensed or Mono, which are the printer's own; the font size. Double-click the text on the label to change it: Enter finishes, Shift+Enter starts a new line, Esc cancels.
- Rectangle: outline or filled, and the line width.
- Line: the line width.
- Image: drag a corner to resize it.
- Nested label: side by side or stacked, refresh its preview, or open that label to change it.
Duplicate and Delete are at the bottom of the panel. Click an empty part of the label, or press Esc, to see the label's settings again.
Move, align and arrange
- While you drag, guide lines show when the element lines up with the label's edges or centre, or with another element, and it snaps to them.
- The arrow keys move the selected element by one printer dot, about 0.1 mm at 203 dpi; with Shift, by ten.
- Grid shows squares of about 1 mm on the printed label.
- Arrange in Properties sets what is in front: Bring to front, Bring forward, Send backward and Send to back; or ⌘↑ and ⌘↓ (Ctrl on Windows), with Shift for all the way. The printer prints in the same order, so what is in front on the screen is on top on paper.
Duplicate, copy and paste
- ⌘D (Ctrl+D) or Duplicate makes a copy of the selected element. It lands a little down and to the right, already selected.
- ⌘C, ⌘X and ⌘V (Ctrl on Windows) copy, cut and paste. Each further paste lands one step further, so copies never hide behind each other.
- A copied element pastes into another label too, in the same tab or another one. With an image on the clipboard, ⌘V puts the image on the label.
Zoom and units
- The label opens at Fit, as large as the window allows. Zoom from 25% to 400% with the buttons, the list, or ⌘ / Ctrl and the mouse wheel or a trackpad pinch. Zoom only changes the view, never the label.
- Sizes show in inches or millimetres, as you choose with in / mm. The editor works in printer dots underneath, so nothing moves when you switch.
Undo and save
- ⌘Z undoes and ⇧⌘Z redoes (Ctrl+Z and Ctrl+Y on Windows), or use the arrows above the label. Undo covers the elements on the label; a changed size or resolution is changed back by setting the old value.
- Unsaved changes shows at the top while the label differs from the saved one. Save stores it.
- Leaving with unsaved changes, by a link, the browser's Back button or logging out, asks first.
Preview the printed label
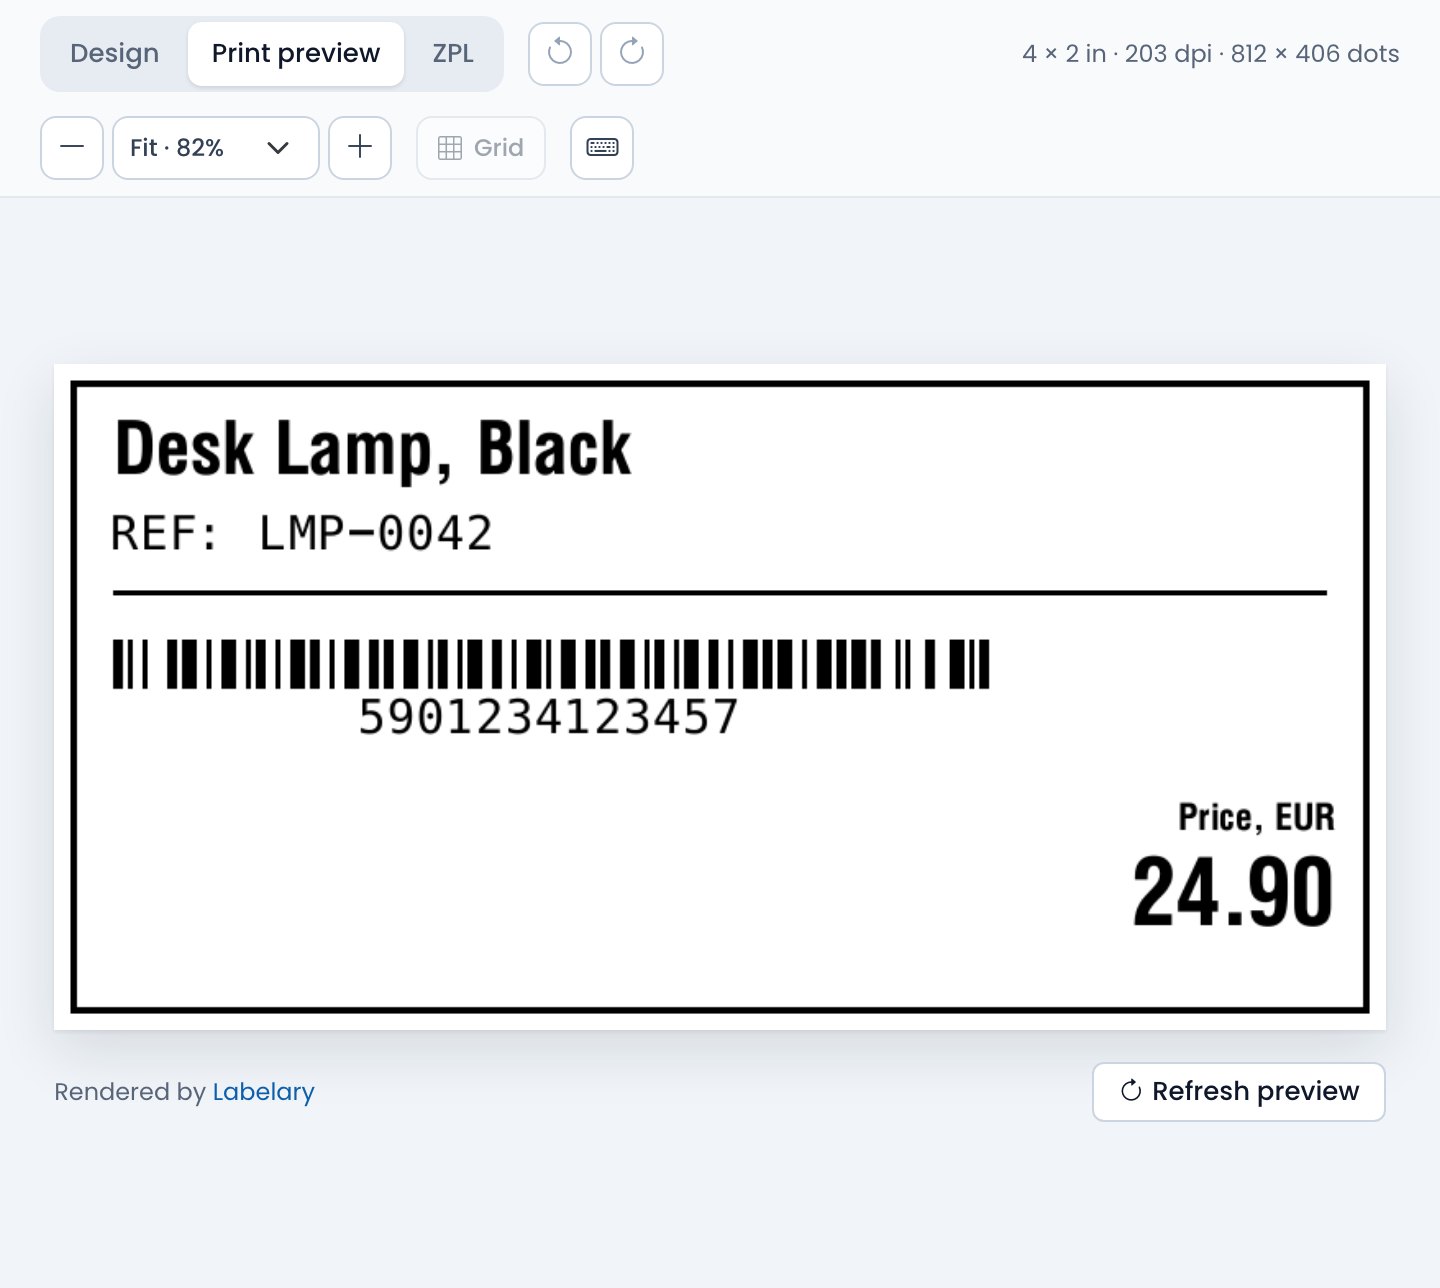
- Print preview shows the saved label as the printer will print it, with data from your Odoo filled in. Save first: the preview is of the saved label.
- ZPL shows the ZPL code that Odoo sends to the printer, with Copy to take it elsewhere.
Publish to Odoo and print
- Publish to Odoo sends the saved label to your Odoo. From then on it is printed there, for the records of its model: for example, from the Print Labels button on products and transfers.
- After a change, save the label, then choose Update in Odoo. Odoo keeps printing the version it has until you do.
- Open in Odoo opens the published label there.
- To print without a dialog, straight to the printer and automatically after an action such as validating a delivery, use Direct Print PRO.
Keyboard shortcuts
In the editor, press ? or choose the keyboard button above the label to see these at any time.
Edit
| Action | Mac | Windows and Linux |
|---|---|---|
| Undo | ⌘Z | CtrlZ |
| Redo | ⇧⌘Z | CtrlY |
| Duplicate the selected element | ⌘D | CtrlD |
| Copy the selected element | ⌘C | CtrlC |
| Cut the selected element | ⌘X | CtrlX |
| Paste an element, or an image from the clipboard | ⌘V | CtrlV |
| Delete the selected element | ⌫ | Del |
| Deselect | Esc | Esc |
Move and arrange
| Action | Mac | Windows and Linux |
|---|---|---|
| Move by one printer dot | ←↑→↓ | ←↑→↓ |
| Move by ten dots | ⇧← ↑ → ↓ | Shift← ↑ → ↓ |
| Bring forward | ⌘↑ | Ctrl↑ |
| Send backward | ⌘↓ | Ctrl↓ |
| Bring to front | ⇧⌘↑ | CtrlShift↑ |
| Send to back | ⇧⌘↓ | CtrlShift↓ |
Text
| Action | Mac | Windows and Linux |
|---|---|---|
| Edit the text | Double-click it | Double-click it |
| Finish editing | Enter | Enter |
| New line in the text | ⇧Enter | ShiftEnter |
| Cancel editing | Esc | Esc |
View
| Action | Mac | Windows and Linux |
|---|---|---|
| Zoom in and out | ⌘scroll | Ctrlscroll |
| Show these shortcuts | ? | ? |